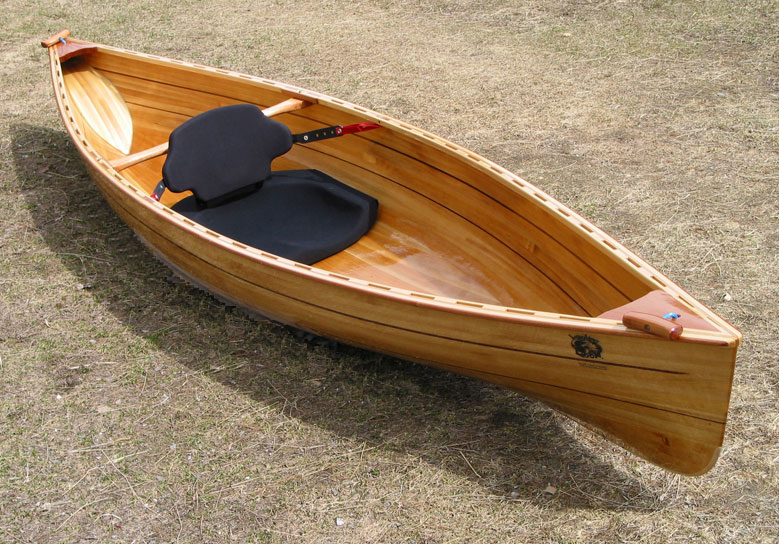
Wooden Canoe Plans for DIYers: Build a Canoe on Your Own
Embrace the allure of handcrafted craftsmanship and embark on a rewarding journey of building your own wooden canoe. With meticulous attention to detail, patience, and a dash of woodworking prowess, you can transform raw materials into a beautiful and functional watercraft. This article serves as your comprehensive guide, providing insights into finding suitable plans, understanding the construction process, and equipping you with the necessary tools and materials to bring your canoe dreams to life.
Choosing the Right Wooden Canoe Plans
The first step in your canoe building adventure is to select plans that match your skill level, desired size, and intended use. Numerous resources offer a wide array of wooden canoe plans, catering to different styles, lengths, and complexities. Explore online platforms, woodworking magazines, and even local boatbuilding clubs to discover plans that resonate with your vision.
Factors to Consider When Choosing Plans:
- Skill Level: Start with plans designed for beginners if you're new to woodworking. As you gain experience, you can venture into more intricate designs.
- Canoe Length and Width: Determine the ideal size based on your intended use. Solo paddling? Opt for a shorter, narrower canoe. Exploring with companions? Choose a longer, wider model.
- Construction Method: Canoes can be built using various techniques, including stitch-and-glue, strip planking, or traditional plank-on-frame methods. Select a method that aligns with your woodworking skills and resources.
Essential Tools and Materials for Canoe Construction
Before embarking on the building process, gather the essential tools and materials. A well-equipped workspace is crucial for achieving precise cuts, smooth surfaces, and a sturdy canoe.
Tool List:
- Hand Tools: A quality hand plane, chisels, a block plane, a mallet, a hammer, a saw, and a tape measure are indispensable.
- Power Tools: Consider investing in a jigsaw, a router, a drill press, and a sander for faster and more efficient work.
- Clamps: Various sizes of clamps are essential for holding components together securely during the construction process.
- Workbenches and Jigs: A sturdy workbench and specialized jigs are valuable for achieving accurate measurements and maintaining stability.
Material List:
- Wood: Select high-quality, rot-resistant wood for your canoe's frame, planking, and ribs. Cedar, spruce, and mahogany are popular choices.
- Epoxy Resin and Hardener: Epoxy resin is used for bonding wood components and sealing the hull.
- Fiberglass Cloth and Resin: For added strength and water resistance, you'll need fiberglass cloth and resin to reinforce the hull.
- Wood Filler: Use wood filler to smooth out imperfections and create a uniform surface.
Step-by-Step Guide to Building a Wooden Canoe
The canoe construction process can be divided into distinct stages. Carefully follow the instructions in your chosen plans, paying attention to detail and ensuring proper fit and alignment.
Stage 1: Building the Frame
Begin by constructing the canoe's frame, which serves as the skeletal foundation. Cut and shape the keel, stem, and ribs to precise dimensions. Use mortise-and-tenon joints or other sturdy connections to create a robust frame.
Stage 2: Adding Planking
Once the frame is complete, carefully attach the planking to the frame. For traditional plank-on-frame construction, use epoxy resin to bond the planks. If you're using strip planking, attach the strips using epoxy and carefully seam them together.
Stage 3: Finishing the Hull
After the planking is secured, carefully smooth the hull using a hand plane or sander. Ensure that the hull is even and free of any gaps or imperfections.
Stage 4: Reinforcing the Hull
Apply fiberglass cloth and resin to the interior and exterior of the hull for additional strength and water resistance. Pay careful attention to the seams and corners of the canoe to ensure a watertight seal.
Stage 5: Adding Finishing Touches
Apply a sealant or varnish to the hull to protect the wood and enhance its appearance. Consider adding decorative trim, seats, and other elements to customize your canoe.
Embark on Your Canoe Building Adventure
Building a wooden canoe is a fulfilling journey that requires patience, dedication, and an appreciation for traditional craftsmanship. With meticulous planning, the right tools, and the knowledge gleaned from these guidelines, you can transform your woodworking dreams into a tangible masterpiece. Enjoy the process, savor the accomplishment, and revel in the joy of paddling your very own handmade canoe.

0 comments:
Post a Comment
Note: Only a member of this blog may post a comment.